Installing a Flaming River Steering Column in a TKX-Swapped 1969 Nova
By Taylor Kempkes – Photography by the Author
Have you ever embarked on a big project like a suspension overhaul or engine swap and got 90 percent done before realizing how it would affect another important aspect of the car? Let’s say you built a complete 383ci stroker small-block Chevy while also yanking your Powerglide automatic and installing a five-speed TKX. Then, after dropping in the complete new powertrain you sit in the driver seat and realize you’ve still got a sticky old steering wheel and a column shifter sticking out right next to the new Silver Sport Transmission floor shifter. In case you haven’t guessed, yes, that’s exactly what happened to us.
Flaming River sent us one of their 33-inch Muscle Car Floor Shift Tilt Key Columns in black powdercoat along with their WaterFall steering wheel and all the installation accessories we’d need.
Read More: Brake and Suspension Upgrade for GM A-Bodies
With the goal of getting our Nova back on the road and out of garage prison ASAP, we were not ashamed to look into making the factory column work. After all, the car started and steered just fine with the original stuff–well, besides the part where the 50-year-old steering wheel seeps sticky goop (when you inevitably touch the wrong part of the wheel it feels exactly like tree sap–yuck).
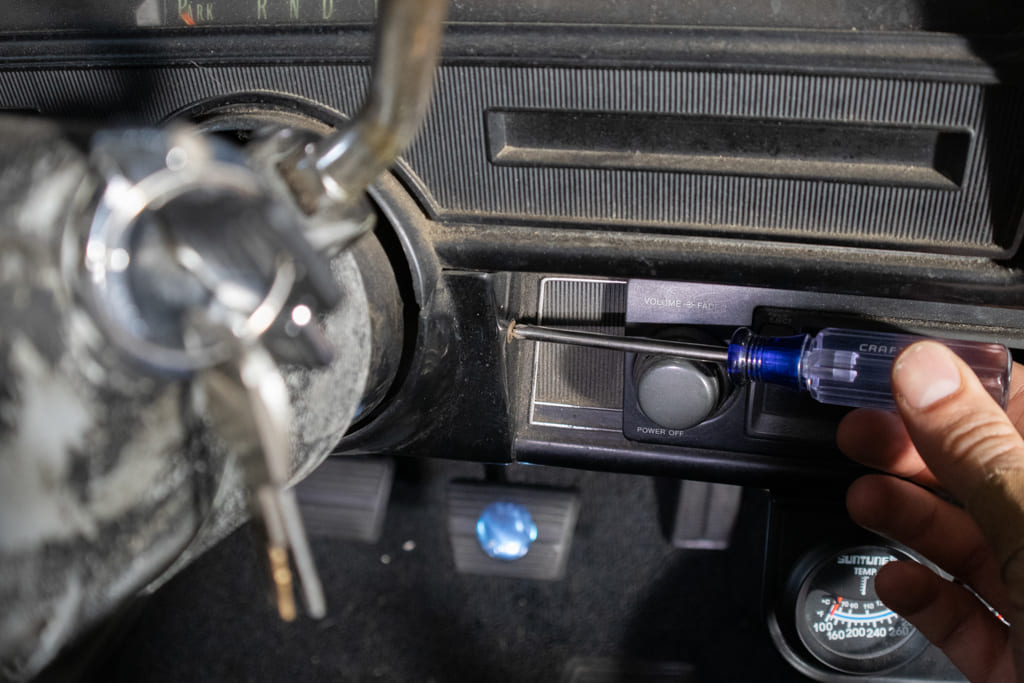
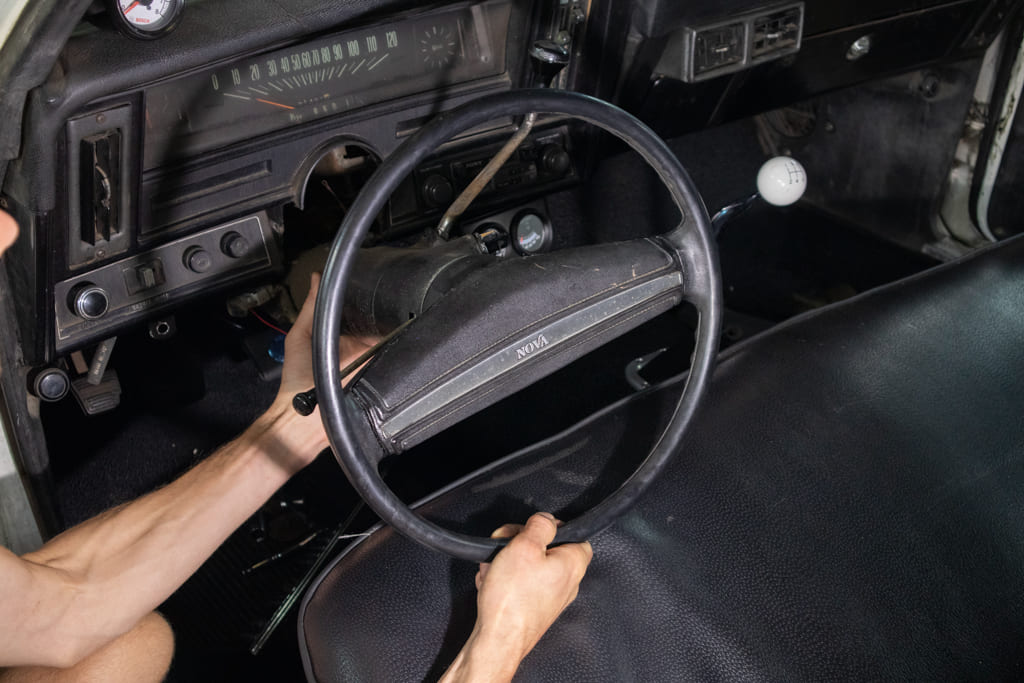
Before we can install the new goodies, it’s out with the old, starting with the lower steering column trim piece.
Now that the car is equipped with a manual transmission there were also a couple potential problems with using the original column. For starters, the column has an ignition lock that only allows the car to start when the shifter is in Park. That would be fine if we could just stick it in Park and pull out the shift lever. But the column also has a nifty feature that keeps the steering locked unless the key is turned in the ignition and the column shifted into any gear but Park. Even better, the key stays locked in the column unless it’s shifted back into Park.
Then we removed the plastic firewall cover at the base of the column.
After some Internet research it looked like the only real solution to all this involved removing the column and tearing it apart. That would certainly be a lot of work and without the certainty of success. Plus, it would mean retaining the old non-tilt column with sticky steering. Our Nova would need an updated steering column and wheel eventually and, as the old saying goes, “There’s no time like the present.”
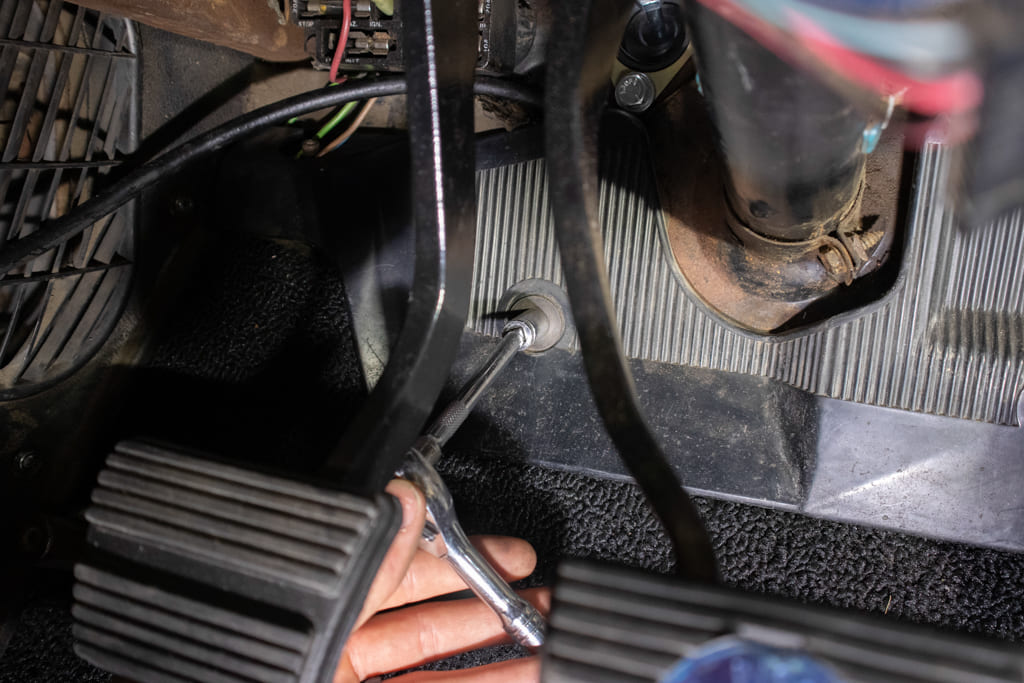
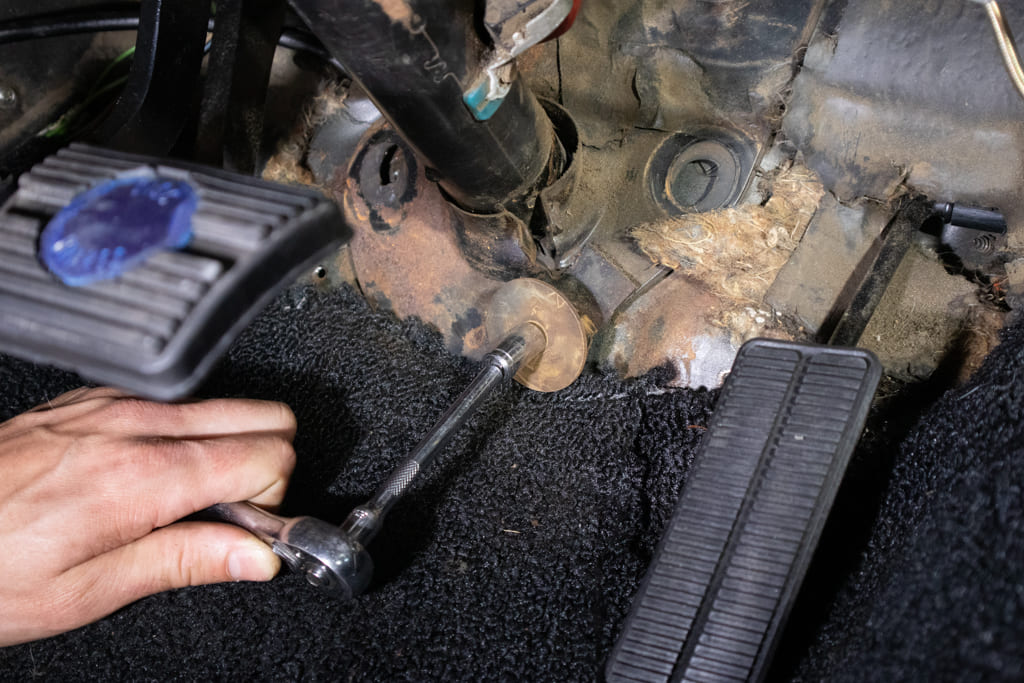
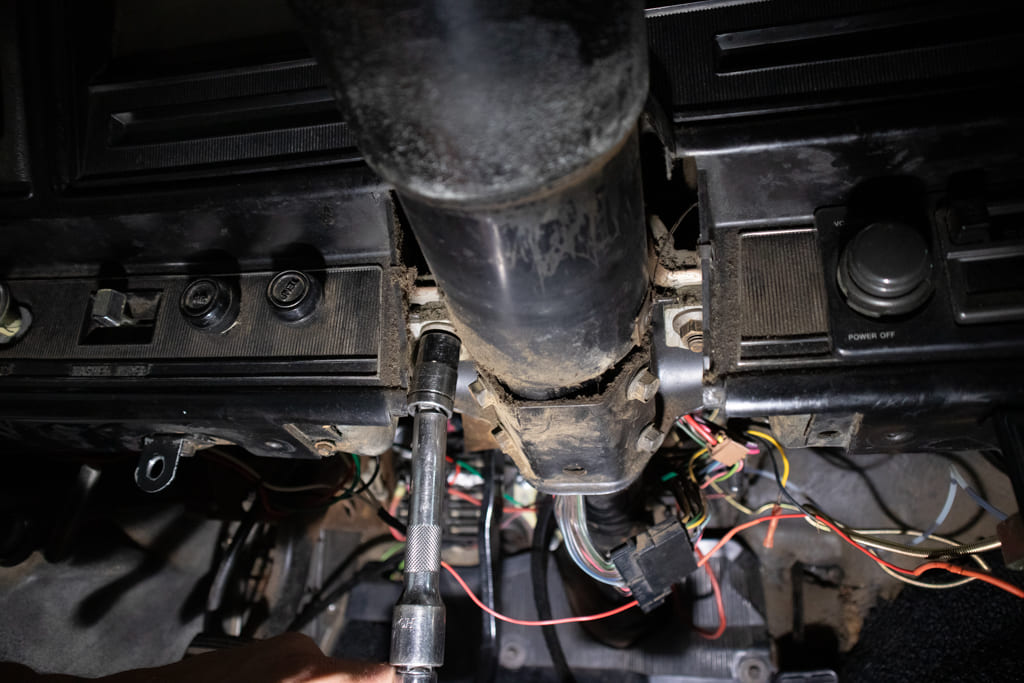
The final step on the inside of the firewall is to remove the four fender washer screws holding the column to the firewall. We’ll clean these up to reuse later.
Read More: Upgrading a ’66 Chevy II with CPP’s MINI Sub-Frame and Control Arm Kit
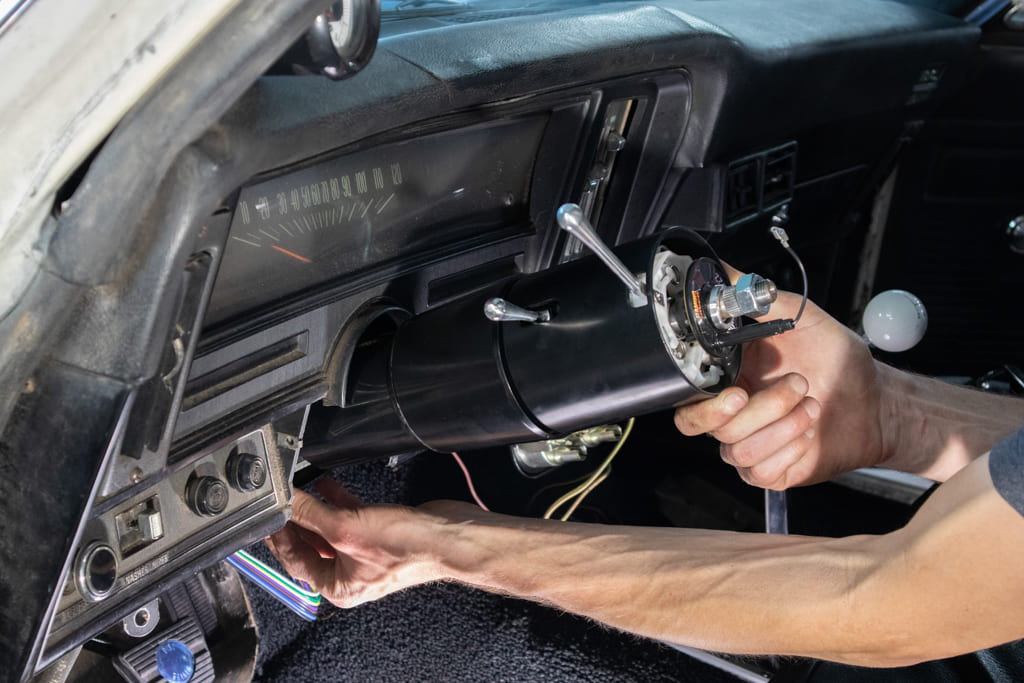
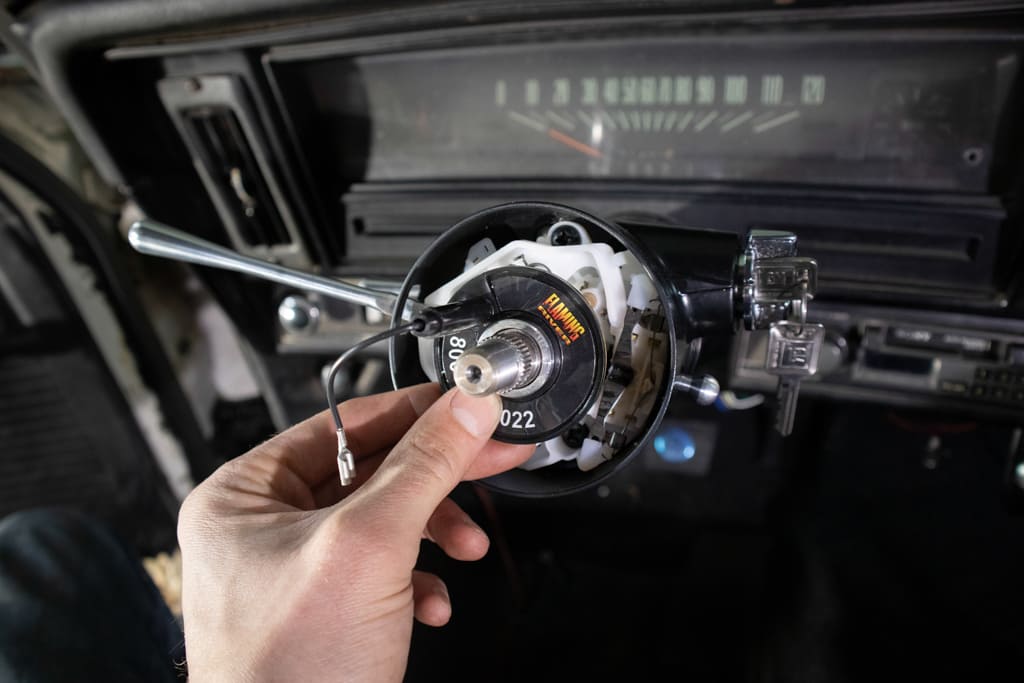
So with that, we reached out to our friends at Flaming River and they hooked us up with the perfect setup for our recently TKX-swapped ’69 Nova: one of their 33-inch Muscle Car Tilt Columns in black (PN-FR30009BK). The column comes with a new set of factory-style ignition keys and, as the name suggests, a tilt head. The black powdercoat would blend in nicely to our otherwise-simple black interior. It also comes with all the factory-style GM wiring to make for an easy plug-and-play installation.
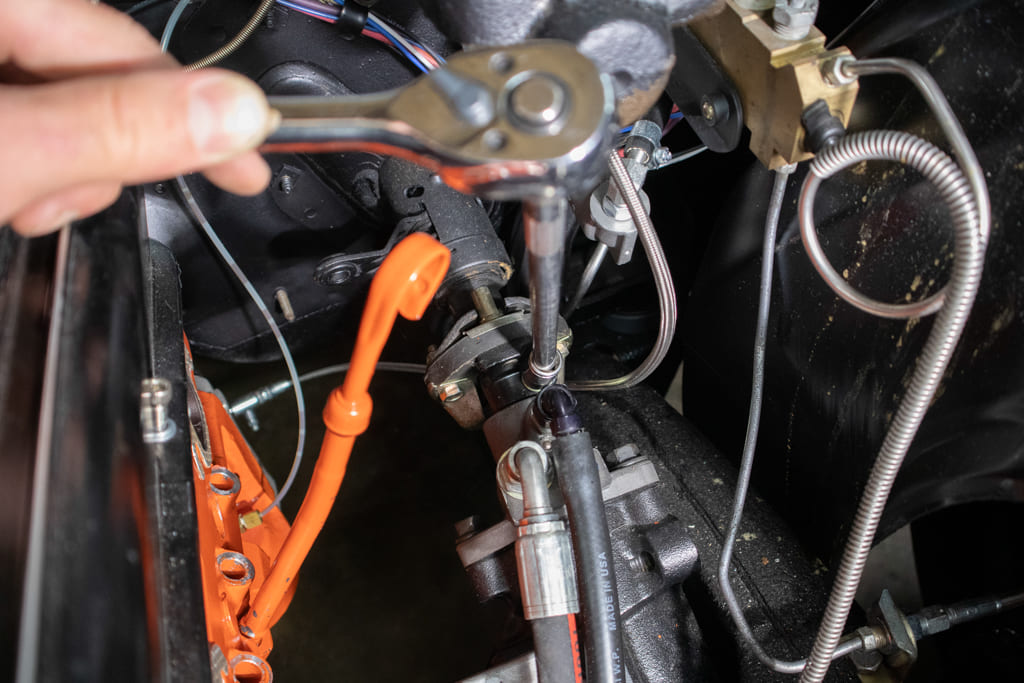
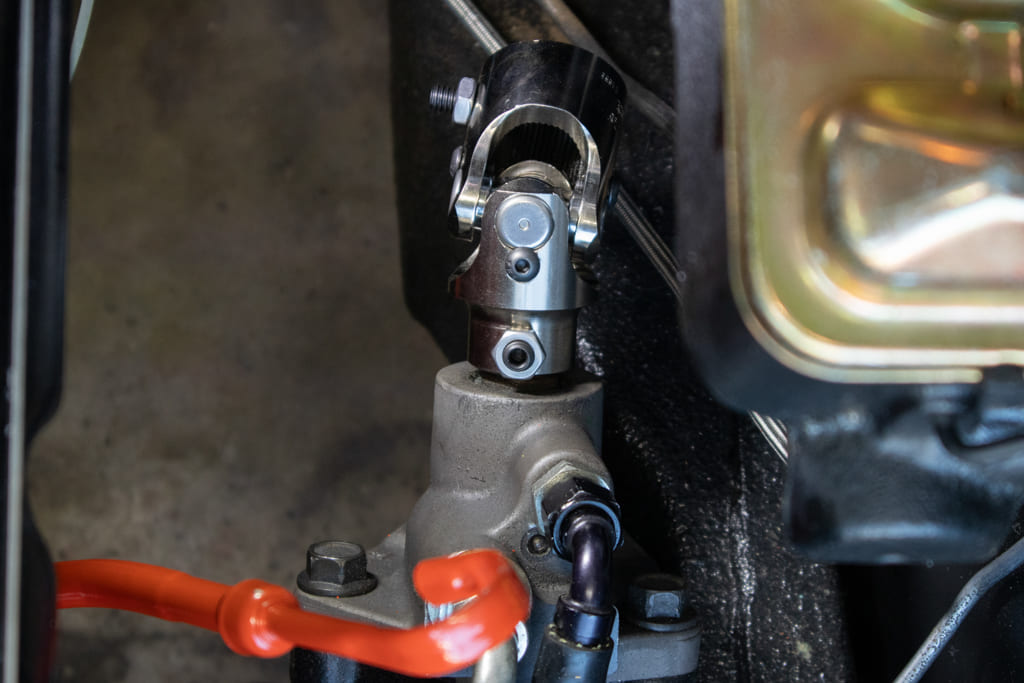
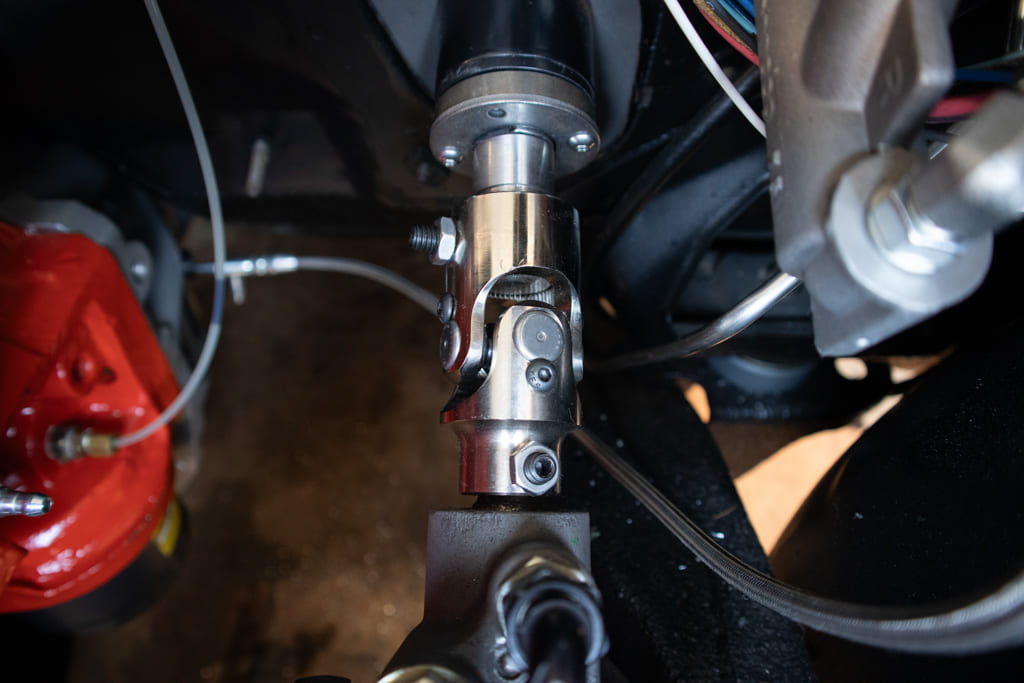
Then, outside in the engine bay, we unbolted the rag joint from the steering box. We’ll use the Flaming River U-joint instead of the rag joint to adapt the new column to our aftermarket quick-ratio power steering box from Detroit Speed.
To mount the sleek new column in our Nova, they also sent one of their Stramp Clamp Mounts (PN FR20300) that works with our factory underdash mount, a Swivel Floor Mount (PN FR20101FB), and a 1-inch-48 x ¾-inch-30 Universal Billet Joint (PN FR1734) to adapt the column to our aftermarket steering box. For the other end of the column, we opted to go with their WaterFall Wheel in black (PN-FR20150), which required the use of their WaterFall Wheel Adapter (PN-FR10150HGADBK).
Two 9/16-inch nuts and unplugging the wiring harness are all that stand in the way of us removing the old column.
Once the unboxing fun was over, it was time to get to work actually installing the shiny new parts. The install went about as smoothly as we could have hoped. The end result? It was the perfect combination of sleek and understated with a more modern look. We just need to button up a few more things in the engine bay from the 383 build and TKX swap then we’ll finally be ready to take our Nova out for a spin.
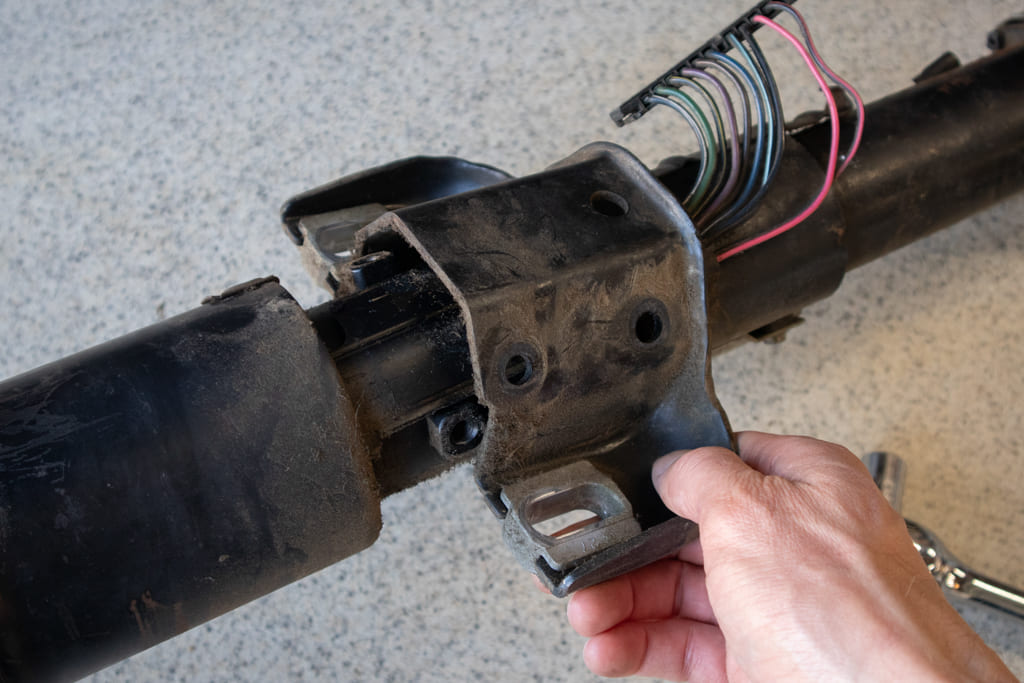
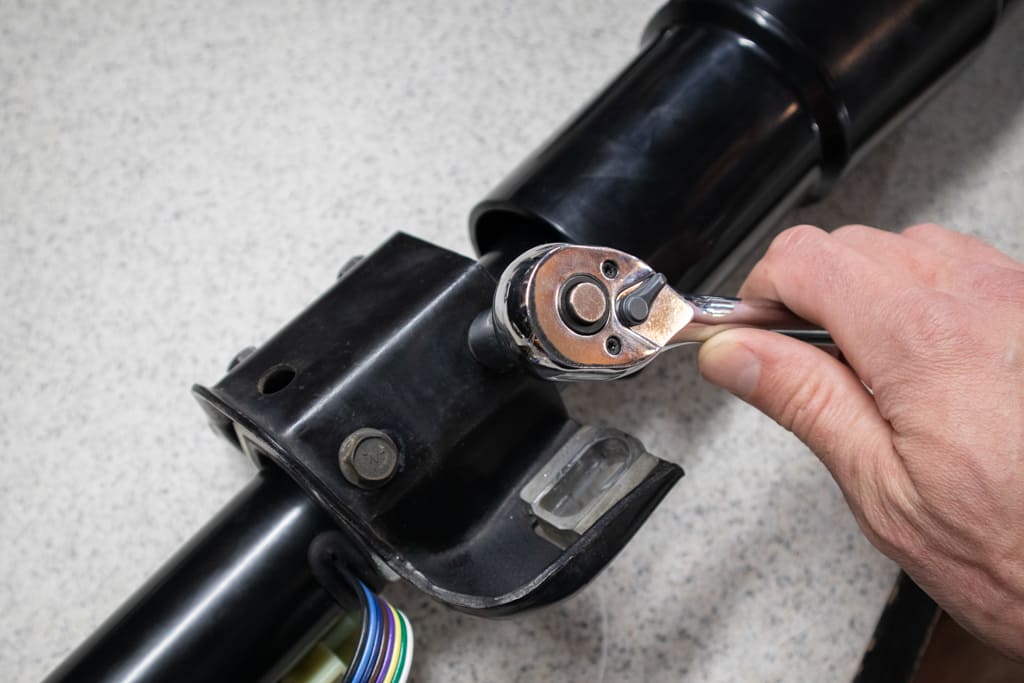
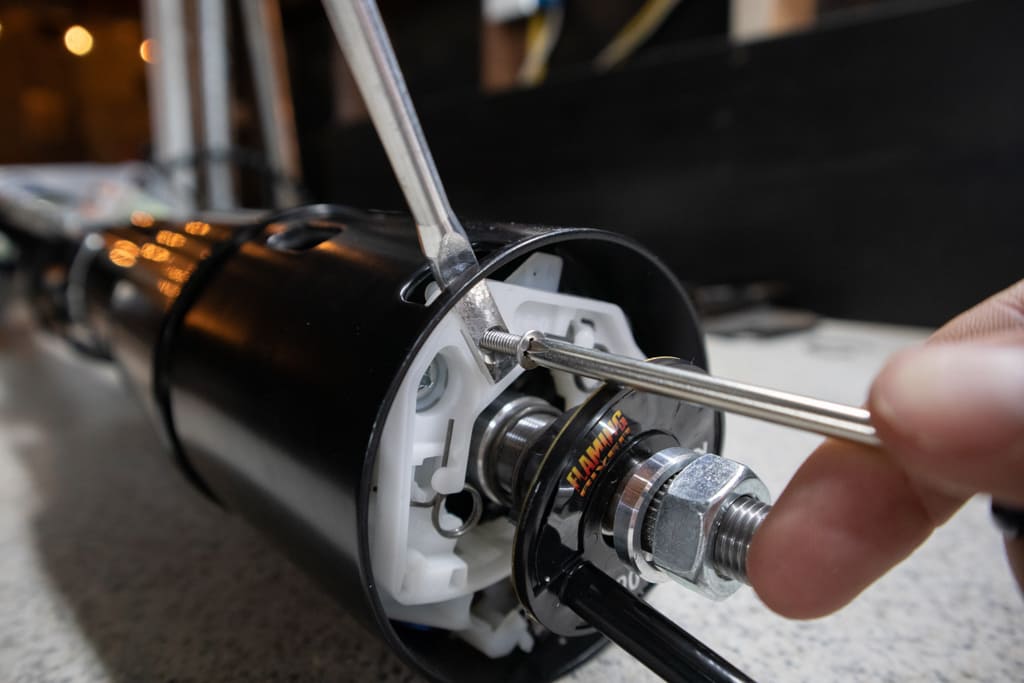
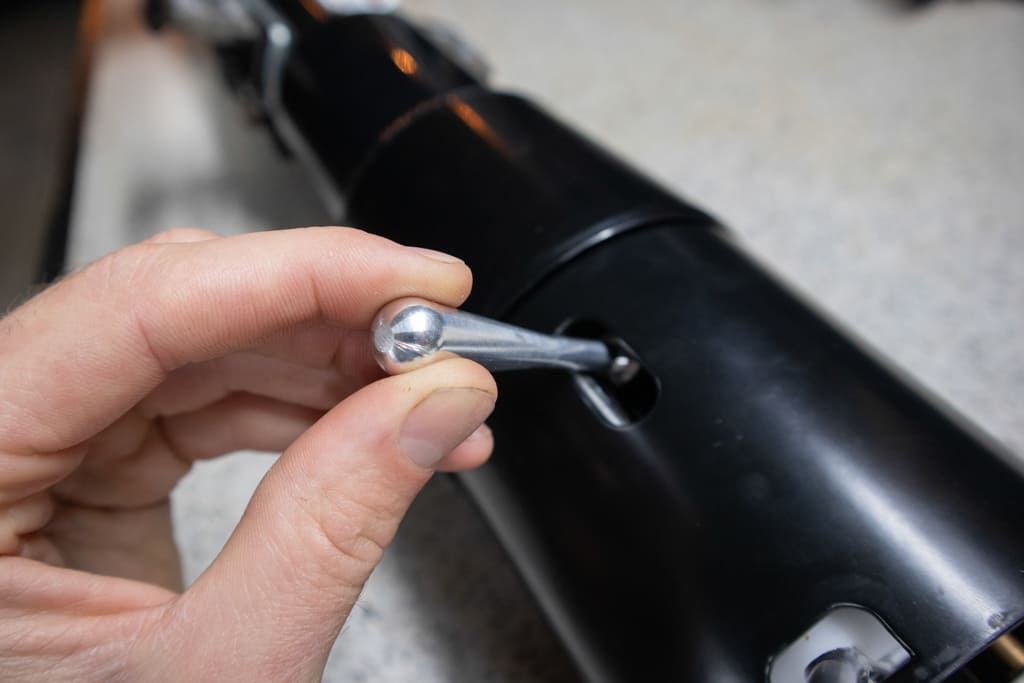
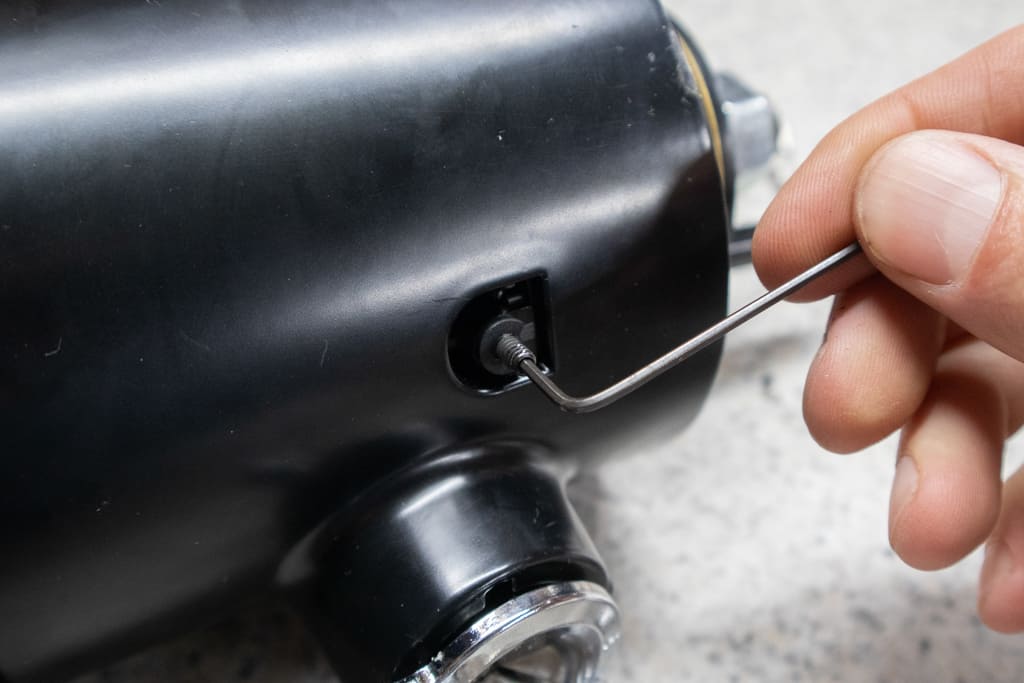
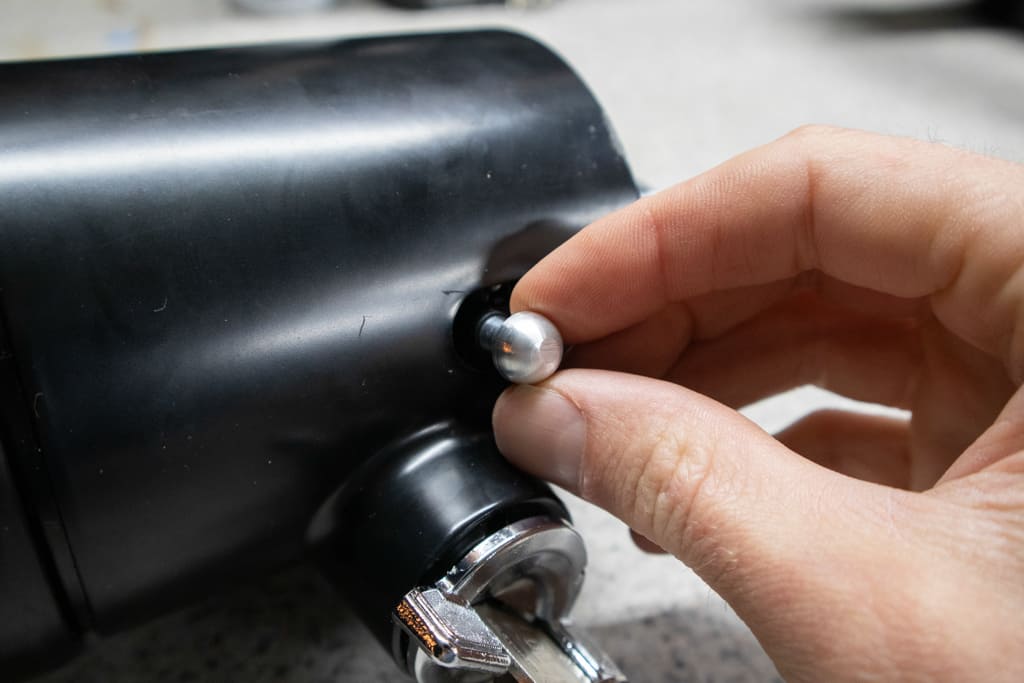
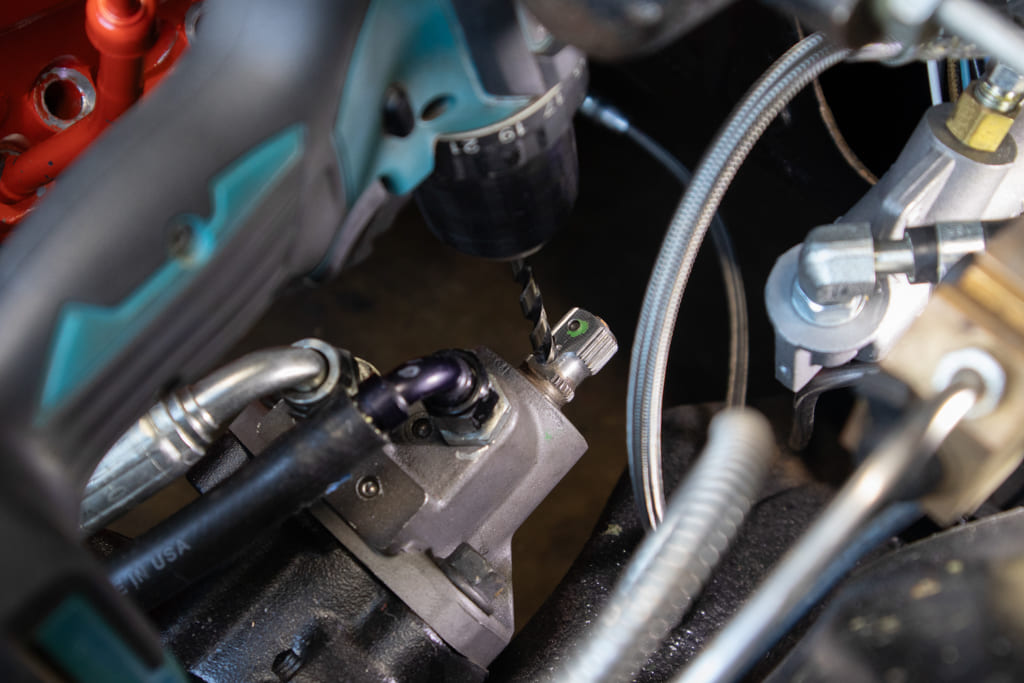
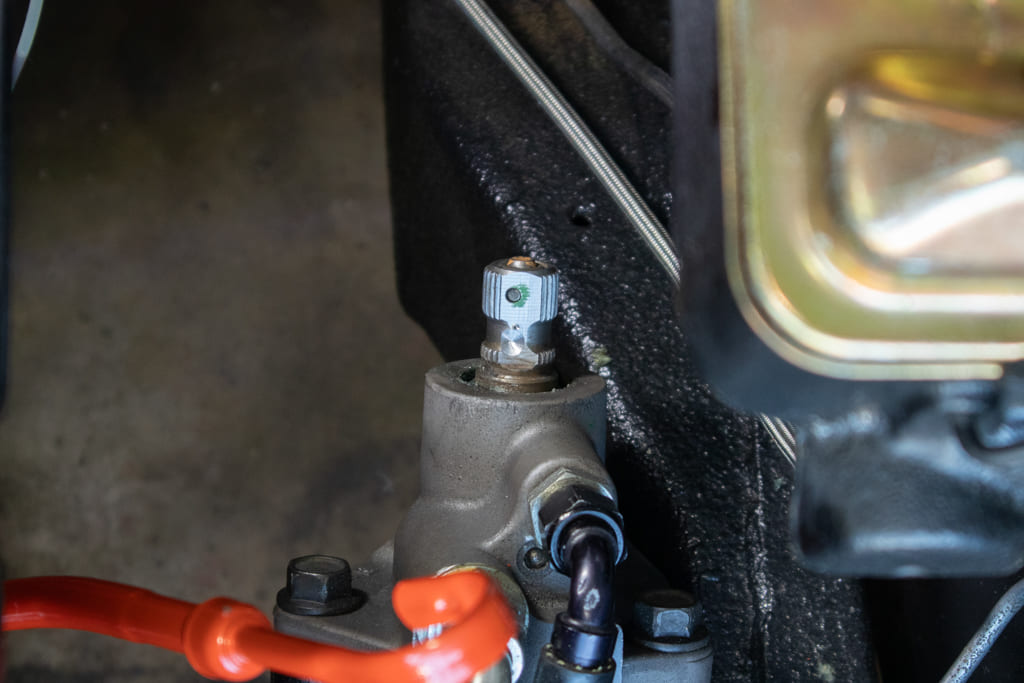
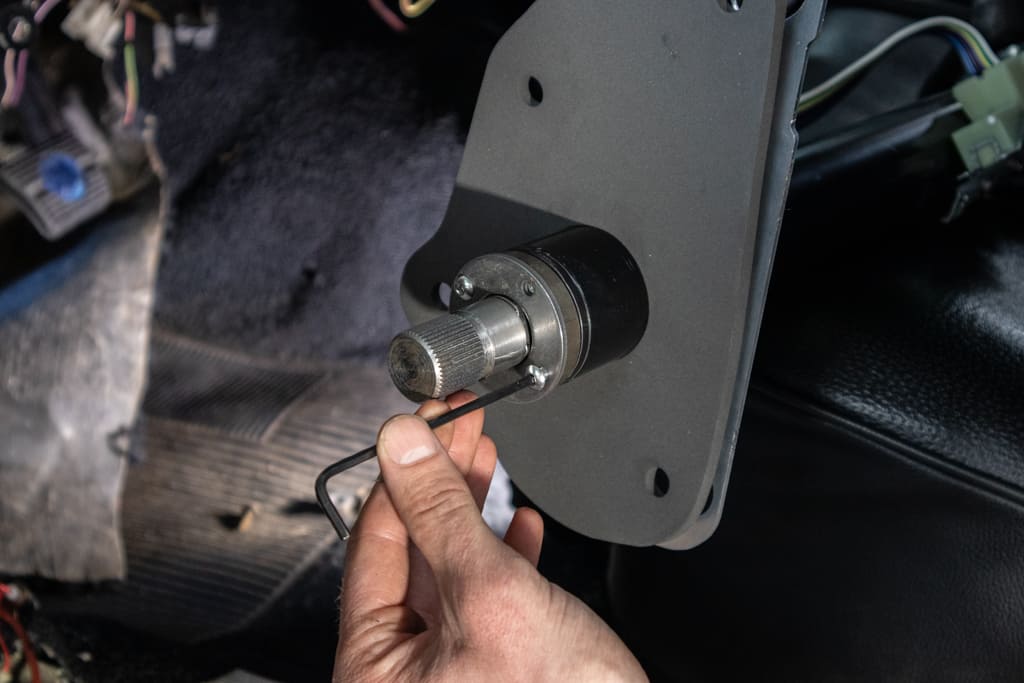
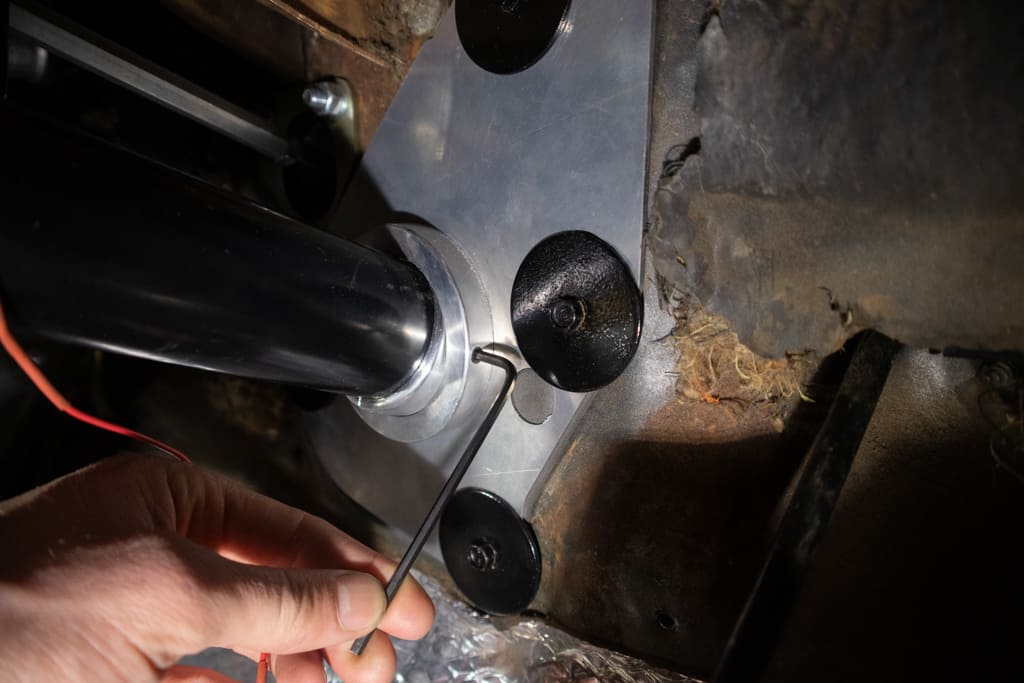
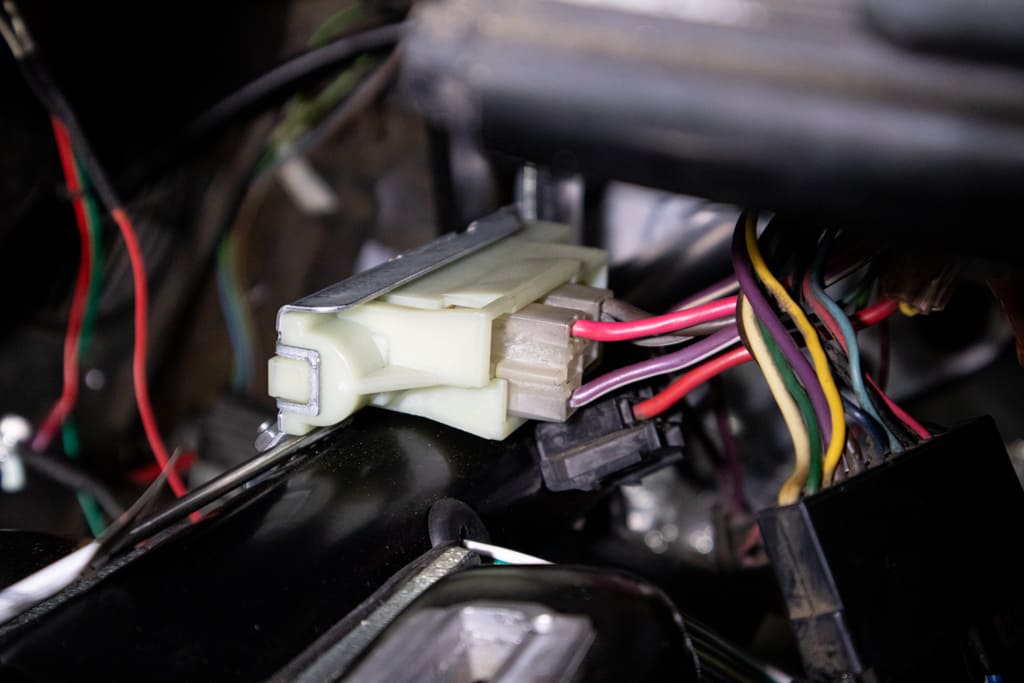
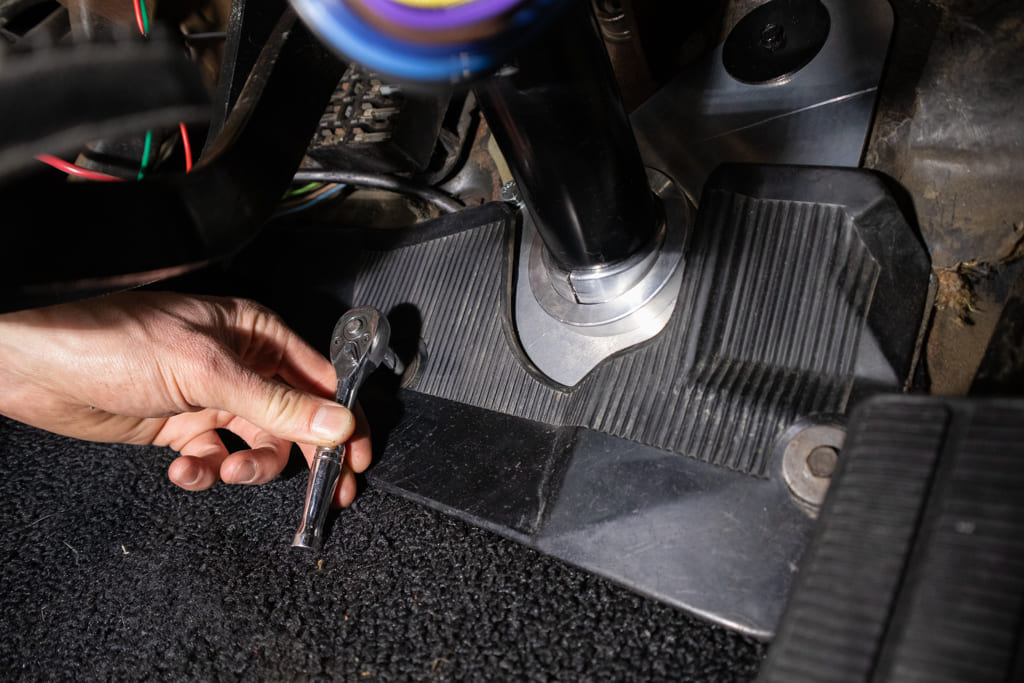
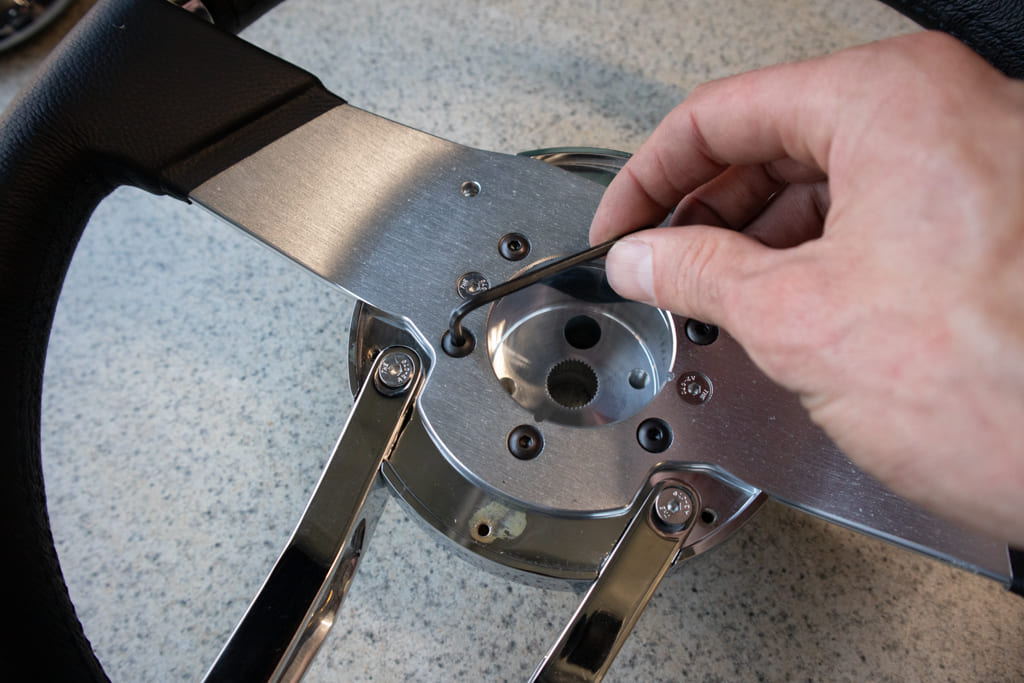
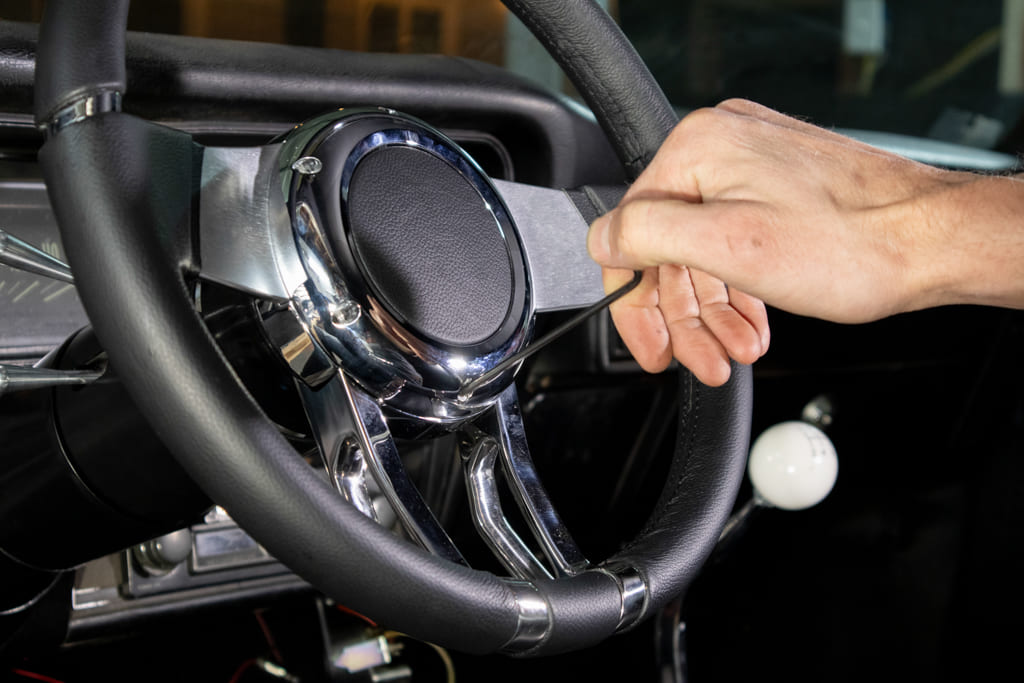
Two shifters, one transmission–boy did that look out of place. Not that our ’69 Chevy has the nicest interior in the world, but the least we could do is install a proper steering column and wheel. Plus, a column and wheel this nice would still look right at home if we did update the rest of the interior down the line.To bolt in the new Flaming River Muscle Car column we need to pull off the original underdash mounting bracket. The Stramp Clamp Mount is made to secure the new column to the factory bracket.The Stramp Clamp Mount has a rubber isolator with four setscrews. You don’t want to crank down on these setscrews too much or you risk puncturing the rubber. We’re going to leave them loose anyway until we test-fit the column in the car.Next, we bolted up the factory underdash mount–which cleaned up nicely–to the Flaming River mount.Up at the steering column head we installed the blinker lever using the supplied sheetmetal screw.The tilt lever is threaded at the base, so it just screws right into the internal tilt mechanism of the column.The hazard knob is a two-part installationA small setscrew is spun into place and used as a stud for the hazard knob to screw onto.We needed a way to connect the new column to our power steering box, so next we installed the billet U-joint.For a more secure attachment, Flaming River advised drilling a small countersink into the input shaft of the steering box using a ¼-inch drill bit. This is accomplished by sliding the U-joint into the shaft ⅞ inch then tightening the setscrew so that it leaves a mark on the shaft …… then the U-joint can be removed and the countersink can be drilled.Before test-fitting the column in the car we loosely installed the Flaming River Swivel Floor Mount and a new foam firewall gasket. The bottom retainer plate needed to be removed to install the mount, so we reinstalled it again after the mounting plate and gasket were in place.Then we could finally feed the column under the dash and through the firewall. A second set of hands are (as far as we could tell) necessary for lining up the input shaft of the column with the wobbly U-joint on the steering box.Once we got everything lined up where we wanted, we went back and snugged up those setscrews in the Stramp Clamp Mount. Then we plugged in our factory harness for ignition and signals to the new steering column.We loosely secured the column under the dash before fully tightening the four firewall screws followed by the two setscrews on the Swivel Floor Mount.When hooking up the ignition harness pigtails, the white one must be plugged in before the black one.With the underdash mount secured for good we could reinstall the factory trim pieces at the firewall and under the dash.Before we forgot, we moved back into the engine bay and fully tightened the setscrews with their jam nuts. We used a thread-locking compound on the setscrews as instructed by Flaming River.Now to install the other fun part: the steering wheel. The wheel bolts to the WaterFall Wheel Adapter using six supplied button-head screws.We made sure to have the horn ring positioned at 11 o’clock with the spring closest to the column and the spacer closest to the steering wheel adapter.Before installing the steering wheel, we made sure the front wheels were nice and straight. Then we fed the horn wire through the wheel adapter and positioned the steering wheel onto the splines of the column.With the installation almost complete, we secured the steering wheel to the column.After attaching the horn wire to the back of the horn button we could finish things up by installing the horn button and trim ring.
Sources:
Detroit Speed
(704) 662-3272
detroitspeed.com
Flaming River
(800) 719-1843
Flamingriver.com
Click on this issue’s cover to see the enhanced digital version of Installing a Flaming River Steering Column in a TKX-Swapped 1969 Nova.
The post Installing a Flaming River Steering Column in a TKX-Swapped 1969 Nova appeared first on In The Garage Media.